1.try-catch风格的axios请求的写法
理论基础:await相当于then,其下面的内容相当于then的{}里面的内容
!(async function(){
	try{
	   const res = await Promise.resolve('success') //await相当于then,但是reject不会触发then,如果是resolve返回的那么就走下面,下面的所有内容相当于{}里面的内容
	   console.log(res) //Promise的then里面的内容,如果是resolve返回的那么就走这里
	} catch(ex){
	   console.error(ex) //try...catch 相当于Promise的catch,如果是reject返回的那么就走这里
	}
})()
所以写法可以为:
data() {
return {
searchInfo: { //分页参数
pagesize: 10,
page: 1
},
}
},
methods: {
onGetPar() { //将复杂的参数构造方法,进行封装,这样获取列表数据的方法也可以统一了(有什么参数就传什么参数)
let { searchInfo } = this; //这样应该相当于let searchInfo = this.searchInfo
let obj = {
pageIndex: searchInfo.page,
pageSize: searchInfo.pagesize,
param: {
cityId: this.cityId,
lstCampusId: this.lstAgentIdData,
provinceId: this.provinceId, //省id
caseTitle: this.caseTitle, //案例标题
grade: this.currentGrade, //年级 6004
isRecommend: this.recommendStatus, //是否推荐1是0否
pubStatus: this.caseStatus, //案例状态 '发布状态0待发布1已发布2已下架'
search: this.userName, //姓名或者账号查询
stage: this.currentStage, //学段 6003
subjectId: this.subjectId //学科 6012
},
sort: "",
sortBy: ""
};
return obj; //封装的参数对象
},
async handleSearch() { //获取列表数据
try {
let params = this.onGetPar();
//写法一:
//await queryCaseForNvWa(params).then(res => { //调用方法
//if (res.code == 0) {
//let data = res.data.body || []; //相当于if(res.data.body){let data = res.data.body}
//this.dataList = data;
//this.dataCount = res.data.count;
//} else {
//this.$message.error(res.message);
//}
//});
//写法二:
let res = await queryCaseForNvWa(params); //调用方法
if (res.code === 0) {
let data = res.data.body || [];
this.dataList = data;
this.dataCount = res.data.count;
} else {
this.$message.error(res.message);
}
} catch (error) {
this.$message.error(error.message);
}
},
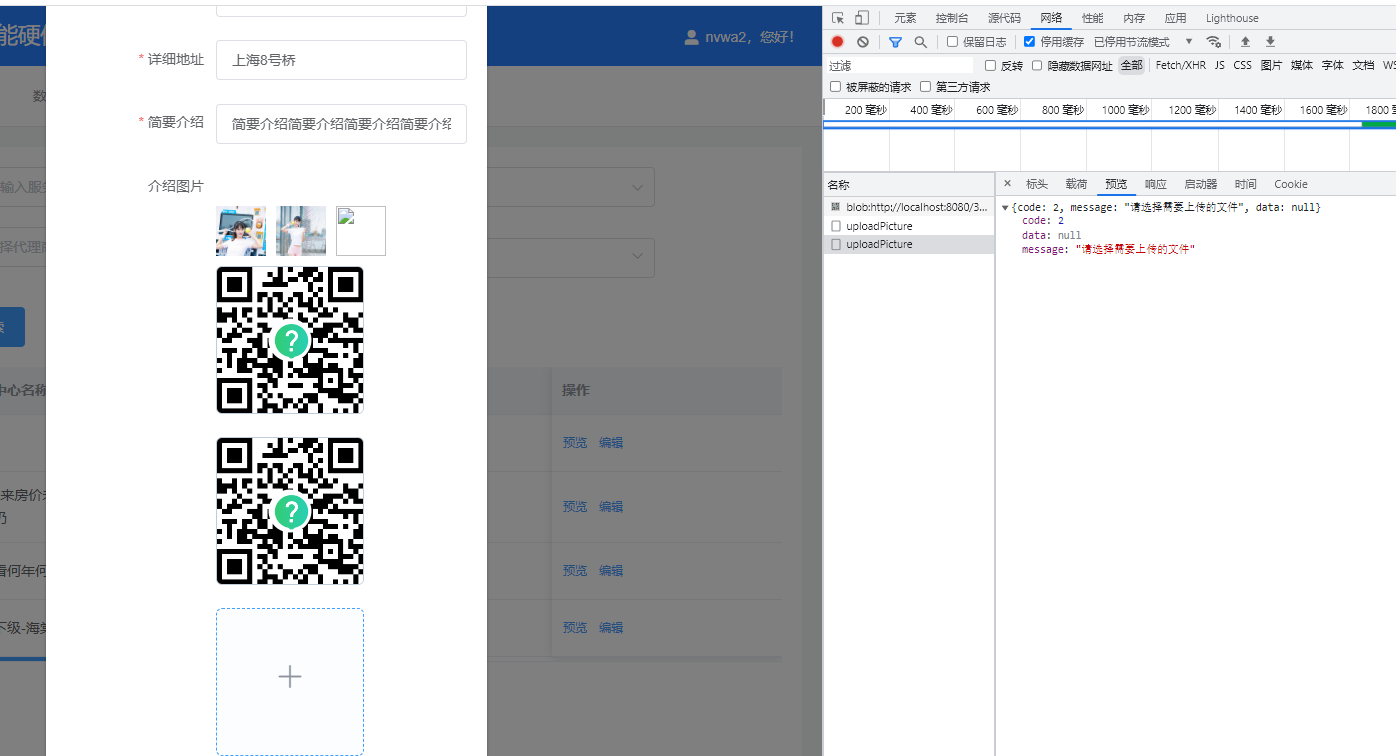
}2.axios接口请求的调试:网络调试debug
进行网络调试的debug,首先清除所有网络请求,然后点击相关操作,查看是否有网络请求,看预览就是返回的内容了!没必要去console.log查看返回的内容!
4.checkout不要忘了
clone代码之后,必须要先切换分支,否则不同分支的代码是不一样的!
5.用v-for根据一个数字n,创建n个div
注意:这里的index是从1开始的
<div id="app">
  <div v-for="index in n" :key="index" class="box">
    {{ index }}
  </div>
</div>
6.可以用iframe的方式关联两个vue项目
第一个项目可以把第二个项目的链接作为iframe
<el-drawer
  :size="750"
  title="预览"
  :visible.sync="drawer"
  :with-header="true"
>
  <iframe :src="previewUrl" style="width:100%;height: 800px" />
</el-drawer>
<script>
export default {
  methods: {
	preview(item) {
      this.drawer = true;
      this.previewUrl = `${serviceCenterPreviewUrl}/case/detail/${item.caseId}`; //链接到serviceIntro.vue
    },
  }
}
</script>
第二个项目,在serviceIntro.vue中,接收链接传过来的参数
let caseId = this.$route.query.caseId;
let campusId = this.$route.query.campusId;
这正是vue-router的强大之处,除了本项目过来的链接可以用router接收参数,其他项目的链接也可以!
7.window.location.host
window.location.host是 JavaScript 中的一个属性,用于获取当前页面的主机名和端口号。它返回的是一个字符串,表示当前页面所在的域名和端口。
在浏览器环境中,window对象代表当前窗口或标签页,location属性是window对象的一部分,用于获取和操作当前页面的 URL 信息。
window.location.host返回的是域名和端口的组合。例如,如果当前页面的 URL 是 https://www.example.com:8080/index.html,那么window.location.host将返回字符串 "www.example.com:8080"。
请注意,window.location.host并不包含协议(比如 http:// 或 https://),只包含域名和端口部分。如果需要获取完整的 URL,可以使用window.location.href属性。
在提供的代码中,通过检查window.location.host的值,可以根据当前页面的域名来进行环境判断,并设置不同的变量值。